Rethink Waste: DIY Beeswax Wrap!

We’re up to our armpits in our second Rethink Food Waste Challenge! Folks are learning all about ways to reduce their household food waste through shopping with a list, keeping their refrigerator organized with an Eat First shelf (a place to keep all the food that needs to be eaten soon!), and only buying what they know they will eat. Another great tip? Shop your kitchen first and make a meal plan for the week before making a list! Beeswax wraps are a useful tool for preventing food waste AND preventing single-use disposable waste in your kitchen.
What’s a beeswax wrap?
Food waste is not the only kind of waste that happens in a kitchen. Stores are full of single-use items like ziplock bags and plastic wrap. A Meliwrap beeswax wrap is a great reusable alternative! If you’ve never seen one in action, check it out here. You can use them to cover a bowl or to wrap a sandwich, for example. You can find these locally made Meliwraps at the Gear Fix, Locavore, Newport Market, and other places around Bend or you can buy them online for delivery!
DIY Beeswax Wraps
If you don’t want to buy them, you can make them! This is a fun DIY project to produce an alternative to that use and toss mindset. This recipe does not use tree resin and plant oils like the Meliwrap, so they are a little less sticky. Beeswax by itself is a little easier to handle in the home kitchen, but if you get adventurous, let us know about your project!
Using the wrap
I like to use my wraps to hold a burrito. Just for simplicity’s sake, I like to wrap my burrito in a cloth napkin first and then use the beeswax wrapper. This way food doesn’t get on them. If food does get on them, you can wipe them off with a washcloth or with your hand with a tiny bit of soap and water, but you don’t want to scrub it too hard because it could remove the wax.
Directions
For these beeswax wraps, here’s what you need:
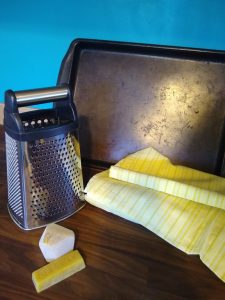
- Some cotton cloth (I used an old clean bed sheet.)
- Beeswax (check in with your favorite honey producer to see if they have some in stock! Also available at craft stores and Natural Grocers.)
- Cheese grater (I recommend having one specifically for crafts.)
- Cookie sheet
- Scissors or pinking shears
- An old paintbursh
Step 1
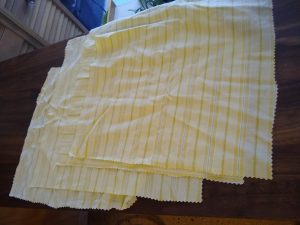
Cut your fabric into whatever size of wrapper you want. It’s nice to have a variety of sizes, but my favorite is about 12″ x 12″. If you have scissors that make a patterned cut like pinking shears, you can use those, but normal scissors are ok too.
Step 2
Grate the beeswax! This can be a tricky step as sometimes the wax clogs your grater holes and you have to scrape it out. Place one or two cloths on your cookie sheet and sprinkle a small amount of wax onto each cloth. Finding the right amount of wax will take some practice, but err on the side of too little!
Step 3
Place the cookie sheet in your oven at THE LOWEST TEMPERATURE setting available. Watch it through the window to see when the wax is melty. When it looks spreadable, take the cookie sheet out and use your paintbrush to spread the wax as evenly as possible. If necessary to redistribute the wax, put it back in for a bit. The key is even distribution and not soo much wax that it pools, which will cake and crust when it dries.
Step 4
Pull your new wrappers out of the oven and pick each up by a corner. Wave it in the air for a bit to cool it off and then hang it up to dry completely. Voila! You’ve got yourself a new reusable beeswax wrap!
-
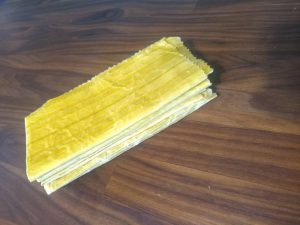
- Stack of folded beeswax wraps.
-
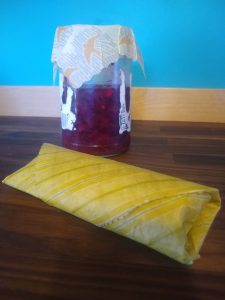
- Beeswax wraps put to work!
Refreshing an old wrapper
As you use your wraps, they show signs of wear. But it’s easy to renew it! If there is enough wax on the wrap, you can just put it in the oven for a minute and it will re-melt into all the cloth crevices. If too much wax has rubbed off, you can grate a little more onto the wrap when you heat it and repeat step 3 above.
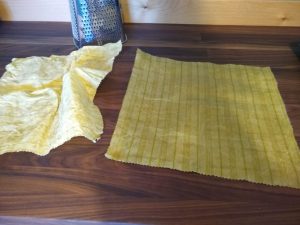
The used wrapper on the left has been around for about 2 years. The one on the right has just been refreshed.
Have you made beeswax wraps? How did they turn out?