December in the School Garden

Winter has set into the high desert, dusting every surface with a layer of frost each morning. Frozen solid ground and freezing temperatures make garden lessons difficult in December. Luckily there are lots of garden-based hands-on lessons that you can lead indoors! Winter is also a great time to plan for the production season, and include your students in the process.
December Garden Activities
Cold Frames
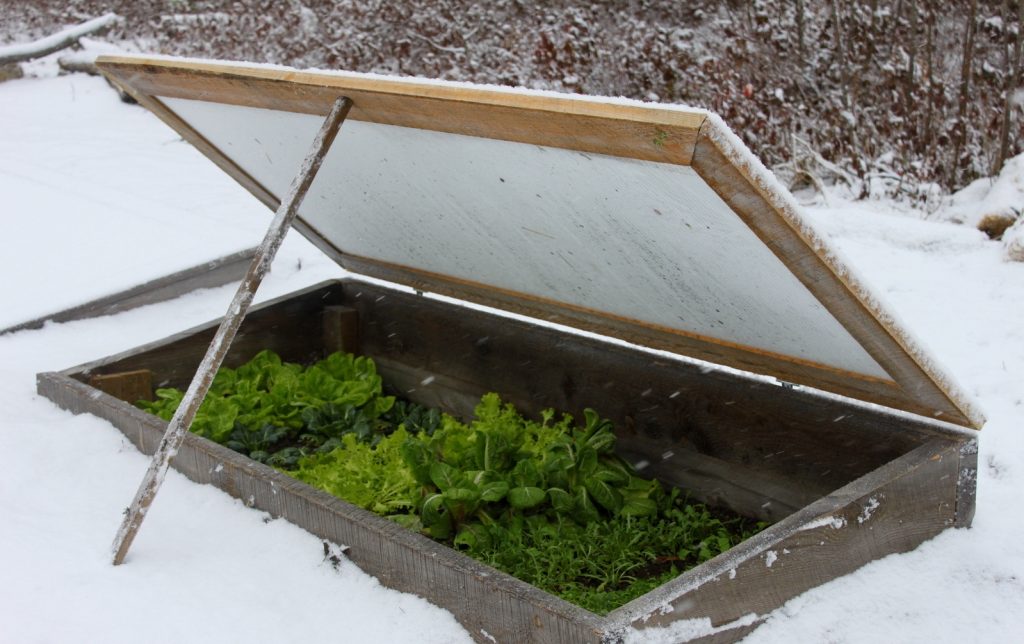
Season extension methods can take you further into the winter than you may have imagined. On a sunny day it can get up to 20 degrees warmer inside a cold frame than it is outside! Even if a foot or more of snow is on the ground, greens and winter vegetables can be grown inside of a cold frame. Plant anything from leafy greens (pac choi, arugula, kale, endives, lettuces) to cold hearty root vegetables (carrots, beets, radishes, turnips, parsnips), or the cold friendly alliums (leeks, scallions, chives). This article from Walden Labs provides excellent advice on building your own! If you want to learn more about cold frames and different season extension methods, check out some of Elliot Colemans work particularly his Winter Harvest Handbook. Season extension makes all the difference in cold climates such as ours here in the High Desert, especially when fitting garden education into the school year!
Plan for Spring
One of my favorite parts of gardening is mapping out the production season. Have you made a base map for your garden? It can be fun to create one, and will result in better utilized space if you plan with correct dimensions. Is there garden infrastructure that needs to be improved in the new year? Do some research and figure out what you need and if it fits in your budget. If it doesn’t, now is a good time to form a proposal to ask your PTA/PTO or other community organizations for garden improvement funds!
Including students in the planning process helps them take ownership of their school garden. A great project idea (recommended for 4th grade and up), is to organize your students into groups and assign each of them (or have them choose) a crop. Give students the opportunity to look through seed catalogs and choose one or two varieties they want to see planted in the school garden in the spring, based at least partially on the growing requirements of the variety. Have students prepare a presentation on why they chose the variety that they did, and persuade the class (or multiple classes!) to vote for their variety of crop. This activity can be extended into seed starting projects and planting schedule calculations.
December 30 minute lesson
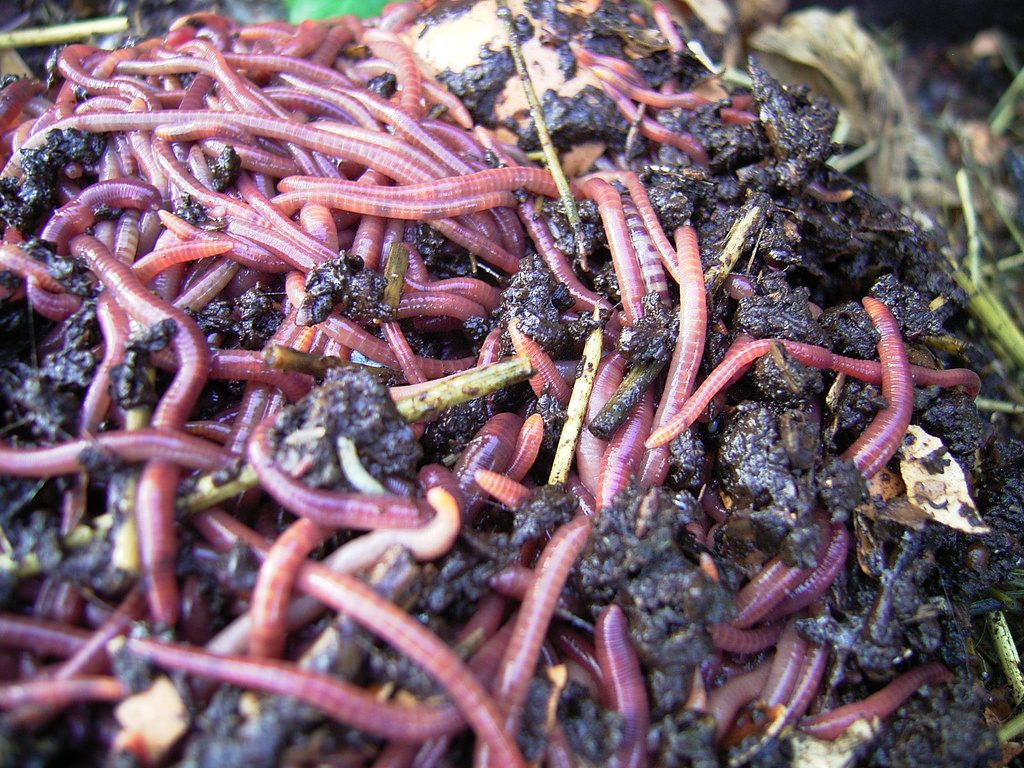 Bring some life into the cold winter and do a worm bin exploration lesson, or build a worm bin with your class! We recommend sourcing worms from the Wonder Worman locally in Bend, but you can also give The Environmental Center a call and we may be able to help you with your worm needs!
To view this lesson in its original format (pg.18), find worm box building instructions, and check out the other lessons in this garden based nutrition curriculum, check out Got Veggies.
Composting With Worms All Grades
Lesson Overview
This lesson is designed to explore the nutrient cycle concept that students were exposed to in the Dirt Made Our Lunch lesson (pg. 14) and to reinforce the idea that our food comes from the soil. Use worm composting as an interactive way to demonstrate the importance of maintaining healthy soil—which keeps us healthy—and introduce students to the significance of worms in this process.
Objectives
Students will:
1. Understand the nutrient cycle and the connection between healthy soils, healthy food and healthy people (Nutrition Ed B.4.5; Science E.4.2, F.4.3, F.4.4, H.4.3; Ecology/Environment E.4.1; Ag Ed D.4.1)
2. Know the function of roots (Science C.4.2, F.4.1, F.4.4)
3. Understand how plants collect and create nutrients people need (Ecology/Environment E.4.1; Health A.4.3; Science C.4.2)
4. Trace foods from origin to table (Ag Ed D.4.1; Nutrition Ed B.4.4; Science F.4.4)
Materials
Food: • Carrot sticks, apple slices, or some other healthy vegetable or fruit snack
Supplies:
• Worm Bin (see Making Your Own Worm Composting Bin on page 44 in the À La Carte section for instructions)
• Vegetable peeler or apple slicer •
Books: Wonderful Worms by Linda Glaser (for K-2/3), Diary of a Worm by Doreen Cronin (for 3-5), Compost by Linda Glaser, Worms Eat Our Garbage by Mary Appelhof, Mary Frances Fenton, and Barbara Loss Harris – Check out the
Preparation
1. Make a garden or classroom worm bin. See Making Your Own Worm Composting Bin activity on page 44 in the À La Carte section of the Got Veggies book for instructions on how to make a worm bin. 2. Get suggested book(s). 3. Harvest or purchase – and wash – carrots and/or apples (or some other healthy vegetable or fruit snack). Cut carrots into sticks and apples into slices.
Activity
Introduction:
Begin the lesson by handing out a healthy snack such as apple slices and/or carrot sticks. Remember to have students wash or sanitize their hands before tasting. While students are snacking, begin a discussion about the nutrient cycle.
Let the students know that today’s lesson is about worms. Ask why they might be eating a snack during a worm lesson? What do apples or carrots have to do with worms? To answer this question, start by imagining an apple tree growing in the ground. Have the class brainstorm everything they know about the apple tree. Lead the discussion with questions about the roots, getting the students to think about the roots drawing nutrients from the soil, and then the trunk “sucking” those nutrients up into the rest of the tree and into the apples themselves.
If we eat an apple from that tree, then where do the nutrients go?
Answer: Into our bodies.
Where did the nutrients from the apple come from?
Answer: The soil.
But how did they get into the soil in the first place?
Answer: Small animals like worms play a big role in breaking down organic material like apple cores and carrot tops and returning nutrients to the soil.
Next, read one or more of the books about worms. You may want to introduce some fun facts (see sidebar) before or during the Worm Bin Exploration.
Worm Bin Exploration:
Before students begin exploring, make sure to mention two worm handling tips: (1) Keep your hands open, so that the worms can breathe; (2) If they start wriggling a lot, they are probably too warm or dry and they need to go back into the cool, moist bin. Ask the students to make guesses about what they will see when the worm bin is opened. You may also want to share some photos of what they might discover in the worm bin (e.g., worm cocoons). See Life Lab’s Worm Bin Bingo page. Smaller classes of about 15 students can successfully stand in a circle around the worm bin, and get a chance to see the bin all at the same time. With larger classes, the class may be divided into two groups: one to see the bin, and one to observe some individual worms, separated out from the worm bin. Extra adult help in the classroom is useful during this part of the lesson. Students may also choose to feed the worms with the scraps from their own snack. Apple cores and carrot peels are both good worm snacks. This reinforces the idea of the nutrient cycle. The worms will help put the nutrients from the food back into the soil, so that more apple trees or carrot plants can grow. Students have fun with the idea that worm poop is healthy soil that helps plants grow. Encourage the students to say something to the worms as they feed them, such as, “Thanks, worms, for turning this back into soil.”